Friday, 28 November 2014

Make Snowflakes with Code for Hour of Code!

Oh the weather outside is frightful, but the fire is so delightful. And since we've no place to go, let it snow, let it snow, let i snow virtual python turtle snowflakes across my Raspberry Pi screen!

Yes, it is that time of year when I break out my christmas jumper, put Frozen on repeat and start eating Lebkuchen by the bucketload. coincidentally, it is also Computer Science Week 8th December to 14th December 2014 and Code.org are asking everyone to take part in just one hour of code. They have created a website full of activities for any ability or interest and one really caught my eye. It is called 'Artist with Anna and Elsa from Frozen'!


I love making patterns with code, as you may remember from episode 27! There is a wonderful python module called turtle. In fact turtle has been around for a long time, and I fondly remember typing my first computer code into a BBC micro to make a turtle draw a square. Therefore I have a bit of a head start, and so the Anna and Elsa activity on code.org only took me a few minutes. As I like a challenge I thought I'd see just how far I could push myself with python turtle to create similar snowflakes. 


I created a python program to draw snowflakes at random places in a window with random pen colour!

If you would like to learn how you can create snowflake shapes with code then check out my latest episode:


If you would like to take a look at my final code then you can clone if from my github page or just take a look here!
 

Thursday, 27 November 2014

Guest Post: Back the Stealthy Badgers Queen of Code Competition Entry

In a former life I was a computing teacher, a job I enjoyed very much. I had the good fortune to meet and teach some wonderful young people who are still in contact with me today. One of them contacted me recently to ask that I help back their competition entry in the Queen of Code. The Queen of Code Campaign is an amazing campaign that is helping push the way for females in the computing world by driving equal opportunities for all. They have teamed up with Creative England and Crowdfunder this time to help push female Game Designers get the recognition that they deserve.


You can help them reach the top 5 by backing their project 'Junior Ninja' for as little as £2. I did back their entry and I hope you will too after you read a little about them:


Who are Stealthy Badger Studios?

Stealthy Badger Studios is an indie games development team based in london. We are currently a team of 6 with our only female team member Tish leading us. Currently we are developing a mobile game called Junior Ninja and are taking part in the Queen of Code campaign with Creative England and Crowdfunder.

The Queen of Code Campaign is an amazing campaign that is helping push the way for females in the computing world by driving equal opportunities for all.They have teamed up with Creative England and Crowdfunder this time to help push female Game Designers get the recognition that they deserve.

Junior Ninja is a 2D platformer for mobiles which sets our ninja, Ned, challenges and training to help him pass his ninja exams and become a fully qualified member of the team. Help Ned move, Jump, and fight his way to glory while collecting as many coins as possible. We’re currently looking to publish our simple prototype online for people to play, so players can get a feel for the style of gameplay. However, this means players will be greeted by Square Ned, as Ninja Ned is still a working progress and we need your help to hire artists to make Ned look his best!


Where and how can you help support us?

Our Crowdfunder page is where you can help support Junior Ninja. Every small donation, or even share on social media makes a big difference and can really help our campaign along!

http://www.crowdfunder.co.uk/junior-ninja
You can also follow our progress via Facebook:
https://www.facebook.com/SBS.JuniorNinja.getnedtospace
Team Leader Tish: @TishGraham_
Luke: @Stealthy_Badger
Matt: @matt123miller
Tom: @Psiethyr
Ash: @AshToplis
Max: @Rairyu94


The team would really love for you to give us your feedback and support so they have kindly provided their twitter pages!

Wednesday, 12 November 2014

Make a Digital Garden Interactive Art Installation with Pibrella and Raspberry Pi

Ever wanted to make an interactive digital landscape? Flowers are great, but they die too quickly. I'd much rather have some flowers that I can enjoy at any time and that spin at the touch of a button! In this tutorial I will show you how to get started with Pibrella and Python 3 to create your own digital garden on a Raspberry Pi.


What you will need:

  • Raspberry Pi model B or B+
  • Pibrella
  • A motor
  • Two male to male jumper wires
  • A flower design

Create your Spinning Flower

Take two male to male jumper wires and cut off the connectors at one end. Strip the wires and solder them to the two contact points on the motor. I also added some hot glue once the solder had dried over the top to make the joint more stable and less likely to break. You may need some help from an adult to do this.

Optional step: If you would like to use your motors later for a roving robot, or to help stick your flower to the motor, glue on a wheel like this one. I used some very strong glue, so make sure that you get the help of an adult to help you do this. 

Design your flower by either cutting out a template like these, or by drawing and cutting out your own. Using blu tack and a drawing pin, add your flower to your wheel or motor. 

Add a Pibrella

Plug your pibrella into your Raspberry Pi. It should fit over the first 26 GPIO pins. Ensure that there is a rubber foot underneath so that the metal parts of the pibrella board do not touch the HDMI port on your Raspberry Pi B+ (as this could short the Pi). 

Look on the Pibrella board for whee it says 'Out'. Beneath are a number of ports that have been labelled. Look for the row marked 'E' and push the other end of the flower/motor jumper cable into the ports next to each other. (It doesn't matter which way round as long as they are both plugged in the row 'E'). 

Prepare your Raspberry Pi

Add your SD card with Raspbian on to your Raspberry Pi and connect it to a screen, keyboard, mouse and power. You can plug the micro usb power into the pibrella board and it will power your Pi too.

Log into your Pi and load the GUI by typing 'startx'. Once loaded, open an LXTerminal window and type in the following commands:

sudo apt-get update 
sudo apt-get upgrade

Once this process is completed (it may take a few minutes) you are ready to download and install the pibrella python 3 library to control your motor. In the same LXTerminal window type:

sudo apt-get install python3-pip

followed by:

sudo pip-3.2 install pibrella

Now you can load the Python 3 programming environment IDLE3 by typing the following:

sudo idle3 &

Let's write some code!

Opening IDLE 3 as the super user allows you to control the GPIO pins with your code in IDLE 3. 

Once the application has opened click on File and New Window. Then save the file as spin.py by clicking on File and Save As.

Begin your program by importing the libraries that you need to control both the Pibrella board and time.

import pibrella
import time

Now we can add lines of code to turn on the motor, wait for a period of time in seconds, and then turn off the motor connected to output 'e' on the Pibrella board.

pibrella.output.e.on()
time.sleep(8)
pibrella.output.e.off()

Save the file and run it by clicking on Run and Run Module. You should now have a spinning flower!

Follow the video tutorial to find out how you can use loops and functions to improve your creation!


Wednesday, 27 August 2014

Learning to Solder

Everyone tells me that soldering is easy. For a long time I've seen it as a barrier to be able to do a lot of electronics or maker style crafts. I usually try and buy components that are pre-soldered or ask someone else to solder them for me. Since joining Raspberry Pi, this has been a bit of a joke for the engineers. They think I'm a bit silly. I'm certain I'm not alone in this.

Recently Wednesdays at Pi Towers have become 'Gert Wednesdays' when Gert comes into the office to visit us and teach some of us new skills. Gert Van Loo is an engineer, and one of the first volunteers working on Raspberry Pi. He has also created lots of add on boards for Raspberry Pi like the well titled 'Gertboard'. He has also created the 'Gertduino'. You can see where Gert Wednesdays come from cant you. Gert promised me he'd teach me how to solder and he didn't disappoint. In one morning of simple tuition I was taught how to solder. THANKS GERT!

I decided that after I solder ALL THE THINGS in my office drawer that I've been dying to use with my Raspberry Pi, I would put my new found knowledge to good use by creating a tutorial video for GGD. It's a short video but I hope it will help give other people the confidence to start or at least to attend a Maker Faire event where they can learn. 


Equipment Required

  • Soldering Iron
  • Solder
  • Stand
  • Something to solder!

Safety Tips

  • Soldering irons get really hot. They can burn.
  • Holding an iron, solder and a PCB requires more hands than you have. Get a clamp to help.
  • Be careful when trimming legs of components that they do not fly off into someones eyes.

Help

I found 'Soldering is Easy' web comic by Mitch Altman, Andie Nordgren and Jeff Keyzer really helpful too. It has some great sketches and explanations. 

Get yourself to a Maker Faire or a Raspberry Jam event to learn how to solder! 


Monday, 14 July 2014

First Look at the New Raspberry Pi Model B+


The latest product from Raspberry Pi was launched today and we are told is the final version of the Raspberry Pi B. It's called the B+ to reflect this and here is a first look video to wet your appetite.

What's the same?

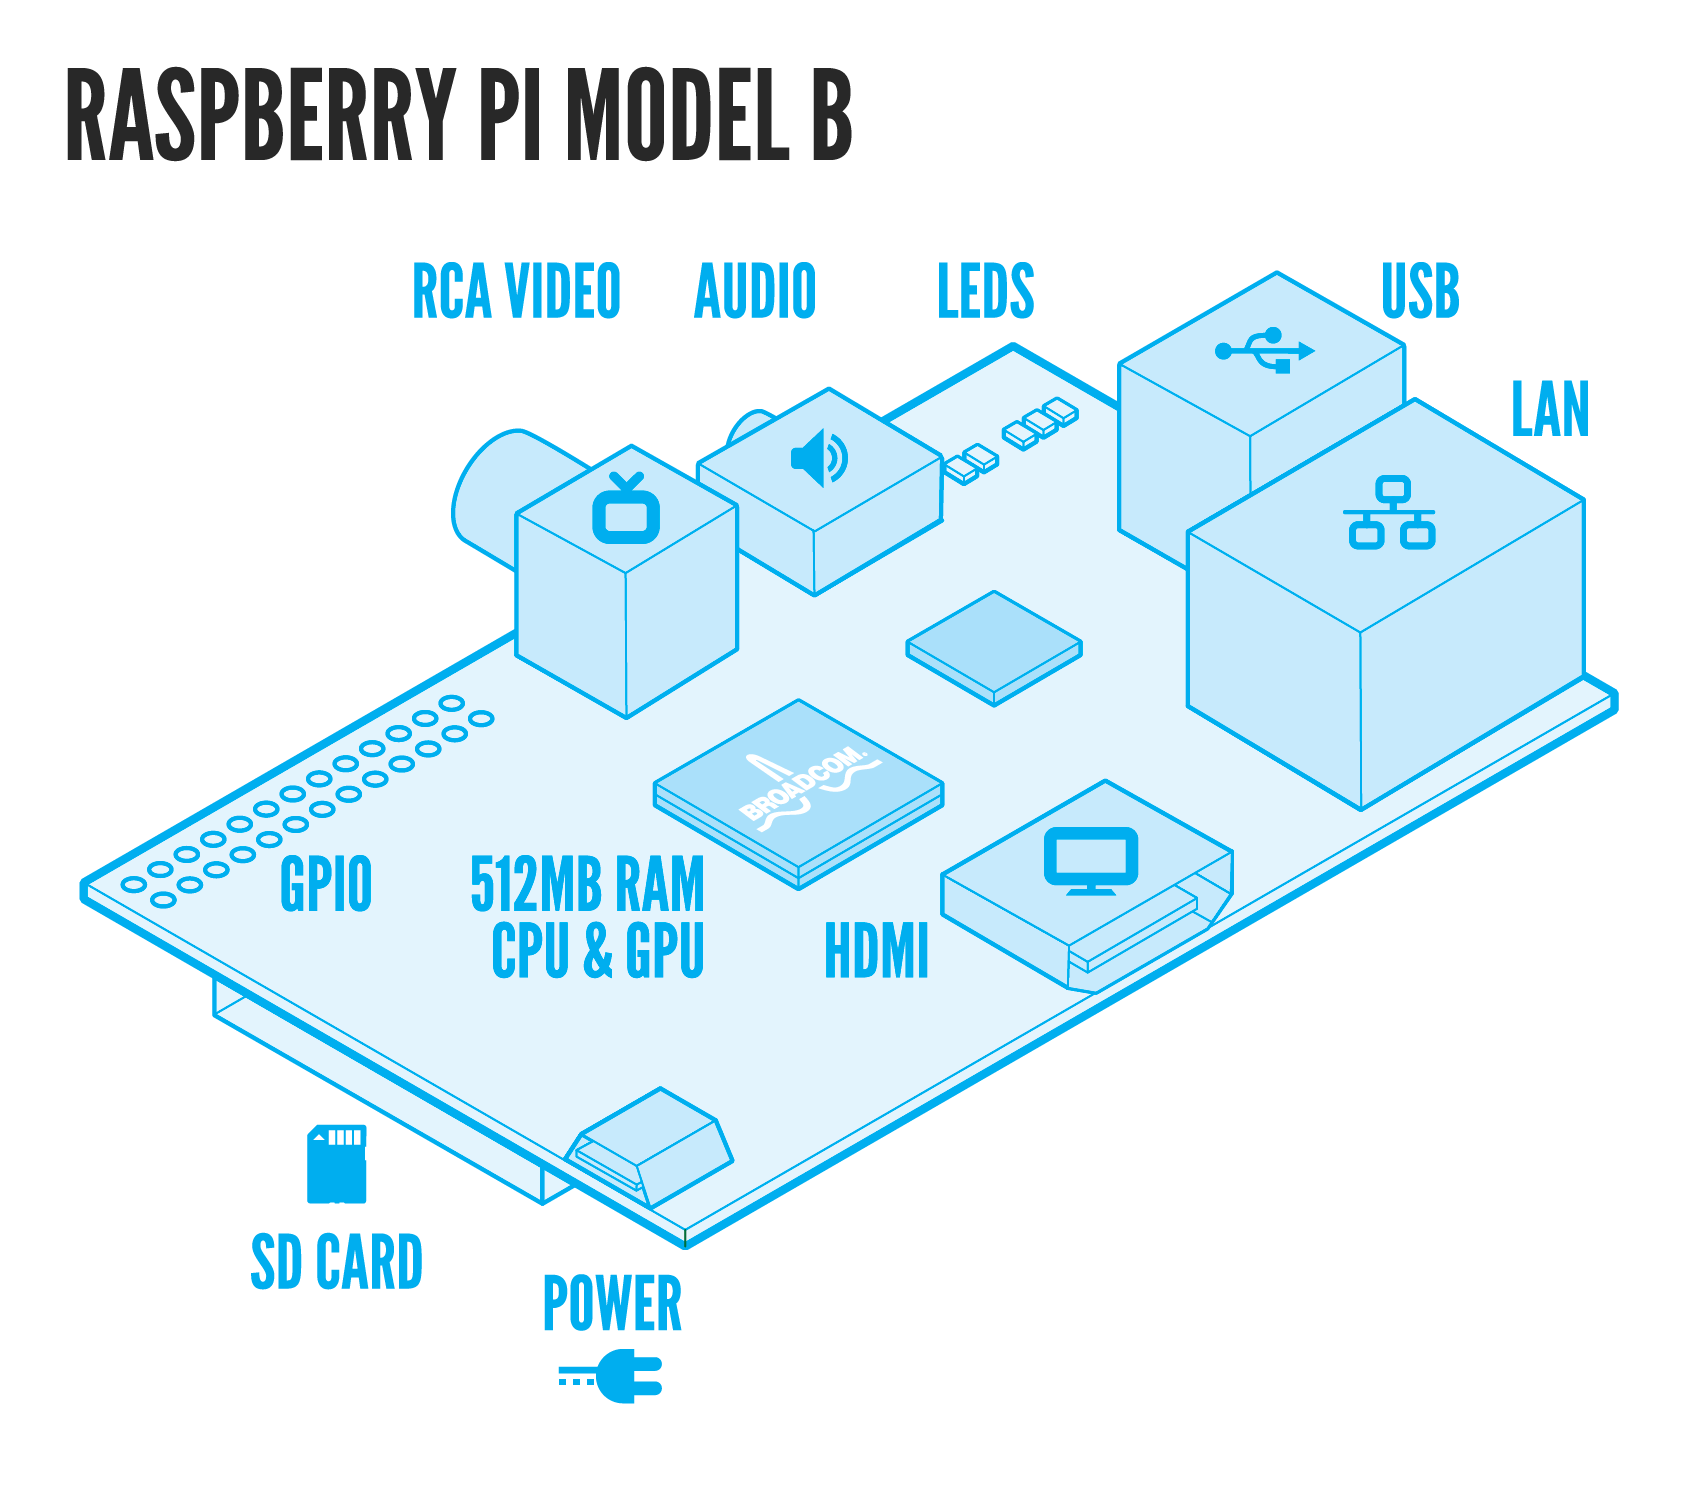
The model B+ has many of the same features as the model B, like the processor and 512MB of RAM. It's also credit card sized, with the addition of rounded edges, and the ports sit flush against the edge instead of sticking out slightly. The operating system Raspbian is also still in use with this model and you can use NOOBS to install the latest version onto a Micro SD card.

What's different?

Lots of exciting new features on the Model B+ such as:
  • 4 USB ports so that you can use more peripherals and accessories alongside your keyboard and mouse.
  • More General Purpose Input Output pins (GPIO). 40 in total, with the first 26 remaining the same as the model B. 
  • Micro SD card slot instead of the larger SD card size.
  • Improved audio for speakers and headphones
  • Improved power consumption.


Note: That on this B+ GPIO diagram that the yellow coloured pins labelled ID_SD and ID_SC are reserved for ID EEPROM so don't use them. At boot time this I2C interface will be interrogated to look for an EEPROM that identifies the attached board and allows automagic setup and the GPIOs. 

And the price is still great at only $35!


Wednesday, 26 March 2014

Interview for Naked Scientists and Linux Voice!

I always tell you, my viewers, just how busy I am, and you're probably fed up hearing about it. Today I have proof that aside from the day job at Raspberry Pi, and the videos I make, I have lots going on!

Most notably, this month I was live on BBC Cambridge for the Naked Scientists Show, and there is a three page article from me and the rest of the EDU Pi gang in Linux Voice magazine!

Linux Voice

I'm a huge fan of the Linux Voice team, they stand up for open source software, and even give back to the open source community through their magazine. They are also huge Raspberry Pi fans, which meant that when I met up with them at the Raspberry Jamboree at the end of February 2014 with my colleagues, Ben and Clive, we had a lot to talk about!


In Issue 2 of Linux Voice Magazine p the Raspberry Pi education team!

All the photos of me are awful, so I'll be stashing my copy at the button of the publications pile for a while.  You can get your copy from newsagents this month or online from here.

The Naked Scientists

Working in Cambridge, England, has many perks. The architecture is pretty cool for one, and being near so many science related colleges makes me feel inspired. Another great thing about Cambridge is the Naked Scientists. 
The Naked Scientists are a media-savvy group of physicians and researchers from Cambridge University who use radio, live lectures, and the Internet to strip science down to its bare essentials, and promote it to the general public.
You can only imagine my excitement when they invited me onto their show with Eben Upton, CEO of Raspberry Pi. It was pretty late on a Sunday evening, so again not at my best, but you can hear the entire show in it's podcast form here. I felt very honoured to have been asked on. 

Wednesday, 19 March 2014

Get Arty with the Raspberry Pi Camera Making Time Lapse


What you will need:

  • A Raspberry Pi
  • A Raspberry Pi Camera Module
  • A Pi Camera Mount
  • Something to point at!

Setting up a Pi Camera with a Raspberry Pi

One of the best add on's for a Raspberry Pi is a Pi Camera. It is a small board that connects to a Raspberry Pi with a ribbon style cable. Connecting a Pi Cam can be fiddly as the cable needs to be the right way round for it to work.

Begin by unwrapping your Pi Camera and removing the small blue plastic from the lens. Next locate the ribbon cable connector nearest to the Ethernet port. It is a small think black connector. Pull the two clips at either ends up to open it. Place the Pi camera ribbon cable into the slot with the blue side facing towards the ethernet port and the silver connectors facing away from the ethernet port. Whilst holding the pi camera ribbon cable gently push down the two black connectors on the Pi.  Finally connect your Pi to a power source and let it boot.

That's the fiddly bit done! Now you will need to configure your raspberry pi before testing that your camera works. After logging in type:

sudo raspi-config

Select Enable Camera from the list with your keyboard and press enter. Select 'Enable' then 'Finish' and  'Yes' to reboot your Pi.

Once your Pi has booted again and you have logged in, and typed 'startx' to load the Raspbian graphical user interface, you can test that your camera works. Open a new LXTerminal window and type the following line:

raspistill -o cam.jpg

Press enter and you should see a preview of what your camera can see. It will then take a picture and save it in your home directory.

Getting Arty with Time Lapse Video

The Pi Camera takes some great resolution images, and is small enough to leave running by a window to take pictures over the course of a few hours. When you put all these images together in rapid succession you create a time lapse video. Here is an example of what you can do if you get good at time lapse photography:


To begin you will need to set your Raspberry Pi and camera up pointing out of a window somewhere. When I was in my office I pointed it out of a window at a road junction which is a bit boring, but sometimes you've got to work with what you have :)

I followed the Raspberry-Pi Spy's tutorial and I've summerised the main points here:

Once setup, log into your Pi and on the command line or from an LXTerminal window type:

mkdir webcam
cd webcam
raspistill -o image_%04d.jpg -tl 60000 -t 7200000

The last command will take a photo every 60 seconds (60000 milliseconds) for 2 hours (7200000 milliseconds) resulting in a sequence of 120 images. 
The “%04d” will result in a four digit number appearing in each filename.
Go away for two hours and when you come back you should be able to see all the pictures taken by typing 'ls' into the terminal window or on the command line.

Now you need to put them all together into a video. There are two ways in which you can do this. Firstly, you could use the Pi to create a video file, instructions for which can be found here, but this takes a long time and can result in your Raspberry Pi crashing. Instead I copied the files from the Raspberry Pi SD card via ftp to my computer. You could also use a USB memory stick to copy them over. Then using Movie Maker I added all the images and set the duration time to 0.04 before saving it as a movie.

Ta da, your very own time lapse creation!

Getting Arty with Stop Frame Animation

The Raspberry Pi is a great, cheap way to get started with stop frame animation. Here is an example of a stop frame animation I made a few years ago, it is actually my first ever YouTube video!


There is a great app created for the Raspberry Pi to help you created stop frame animations called 'Pi-mation':


All the steps you need to follow to download and install Pi-Mation can be found here. It is really easy to use.

Have fun! Point me in the direction of any of your creations. :)

Thursday, 13 March 2014

Girls in Tech Teaching Kit - Made at Mozilla Festival 2013

This weekend has been a weekend of firsts. First participation in a scrum, first time meeting some awesome educators and webmakers, first time meeting @maggiephilbin, first time hugging a giant fox, first time collaborating on a teaching kit using Mozilla Webmaker tools.

Click on the image to access the teaching kit

My Saturday begun by joining a group of webmaker educators in a build and teach the web session in which a scrum board had been set up with lots of different projects.


On Sunday I designed a badge of my own and decorated a t-shirt:


Monday, 10 February 2014

Programming Pictures with Pygame

I love 8 bit pixel graphics from old arcade games like Space Invaders! I'm not sure why I loved them so much, perhaps it's because I enjoyed those games so much as a child.


It got me thinking about making my own pictures using code. Perhaps even my own space invader animation!


To make your own Python Pixel Art you will need:

  • Square paper
  • Colouring pencils
  • A Raspberry Pi or a Computer with Python installed

Instructions:

1. Taking a sheet of paper with squares, write 1 through to 9 across one row, and 1-6 down one column to make a grid.
2. Draw your design or space invader in this grid using colouring pencils.
3. On your Raspberry Pi or computer, open IDLE and create a new text editor file by clicking on File and New Window.
4. Start your code by importing the modules you will need:

import pygame, sys

5. Next setup your pygame window using:

pygame.init()

screen = pygame.display.set_mode([225, 150])

6. Next create variables for each of the colours that you wish to use. I've used red and white here, but you can use as many colours as you like:

r = pygame.Color("red"
w = pygame.Color("white")

7. Now for the fun part, writing the code that will create your picture. Here we can use an array in Python. This is where your diagram from step 1 comes in really handy. Look at row 1 on your drawing and type the first line between square brackets [ ]. Then do row 2, then row 3 and so on:

data = [ 
 [ w, w, r, r, r, r, r, w, w ], 
 [ w, w, r, w, r, w, r, w, w ], 
 [ w, w, r, r, r, r, r, w, w ], 
 [ w, r, r, r, w, r, r, r, w ], 
 [ r, w, w, r, r, r, w, w, r ], 
 [ r, r, w, w, w, w, w, r, r ] 
 ]

8. Next we use a for loop and enumerate to display the picture how we want it. Enumerate allows us to get both the index and the data at that index for every element of the array. For instance, the first time round the outer loop, y = 0 and row = [ w, w, r, r, r, r, r, w, w ].

for y, row in enumerate(data):
  for x, colour in enumerate(row):
    rect = pygame.Rect(x*25, y*25, 25, 25)
    screen.fill(colour, rect=rect)

9. Finally we add the code that will run our pygame program and keep it displaying the image until we want to exit:

pygame.display.update()

while True:
  for event in pygame.event.get():
    if event.type == pygame.QUIT:
      sys.exit()

Challange:

Can you create two pictures and animate them?

Sunday, 9 February 2014

Competition Winners & Working at Raspberry Pi

As ever, this geek gurl has been really busy. 2013 was turly a life changing year for me, as I won an award for Geek Gurl Diaries and even wrote a book 'Adventures in Raspberry Pi'. At the end of the year I made the decision to leave teaching (which was hard and sad) to join the Raspberry Pi Foundation to educate young people globally (which is fun and yay!).


I've been at the foundation for little over a month and can say that I've never been busier! I've been speaking at events like BETT, and running workshops at Raspberry Jam events. But never fear viewers, I am continuing to make videos. Just remember, it takes time to make a final polished piece for your consumption. I'm a perfectionist, and want to you to enjoy computing as much as I do, so be patient!

In the meantime here are the winners from the video competition to win a signed copy of Adventures in Raspberry Pi:


Your prizes will be on their way to you in the next few days. All the best with your Raspberry Pi and programming projects!

Thursday, 28 November 2013

Get the Geek Gurl Diaries Badge!

I attended Mozilla festival again this year, and spent some time in the Open Badges zone creating my very own GGD badge using card, glue, and my imagination. That's the last I thought I would see of it but no! The lovely people at Mozilla made my badge for me! Check it out:


I love it! If you like making and receiving badges, why not check out Mozilla Open Badges yourself. 

Wednesday, 30 October 2013

Geek Gurl Diaries goes to House of Commons!

On Tuesday 29th October 2013, I put my on my finest frock, rallied the troops, and made my way to the House of Commons in London for the Talk Talk Digital Heroes Award Ceremony 2013.

Queen Anne Blend was my favourite, so much so I bought teabags on my way out!

First off, seeing as I was with friends and all dressed up, it seemed silly not to capitalise on the day by visiting Fortnum & Mason's Jubilee Tea Rooms in Picadilly and having Afternoon Tea. (Perhaps I've just been watching too much Downton Abbey?) 

Getting nervous waiting outside the House of Lords


After eating ALL THE CAKES we made our way to the common outside the House of Lord's to meet all the other Digital Heroes from around the UK. They had travelled from all over to my city, which made me feel very guilty indeed. We had many photographs taken of us before we made our way through the most epic security I've ever encountered. Luckily our names were on the list, so we got in!


Team GGD: +Emma B (@embre) & +Alex Bradbury  (@asbradbury) who have supported the project from it's early days and deserved a trip to the House of Commons too!

Very quickly we were whisked through various halls and chambers (which was a little sad as I really wanted to look at the old paintings and architecture, into the Churchill Rooms, where another afternoon tea, this time with Champagne, awaited us. My little party of three quickly became four, as we were joined by my local MP, Jon Cruddas (@JonCruddasMP) who kindly welcomed and entertained us as his guests. 

Lots of hand shaking goes on when you are 'Dagenham's Daughter'

Talk quickly turned to the work that I have been doing in Dagenham at my school, and the work I've been doing on Geek Gurl Diaries. In the course of two hours, the three of us gave one MP: a lecture on the importance of teaching our children computing concepts; the success of my own students; and the possibilities that their futures can hold through being exposed to computer science.   I'm not sure Jon was prepared for what he got, but I'm happy to report it resulted in him wanting to learn more, and organising a visit to my school to see my cs lessons in action. 

Receiving my award from Martha Lane Fox (Co-founder of lastminute.com) , Lloyd Embley (Editor in chief The Mirror) and Talk Dido Harding (CEO Talk Talk)

The award ceremony got into full swing when Chi Onwurah MP (Shadow Minister Business, Innovation & Skills) and Ed Vaizey MP Under Secretary of State for Culture, Communications & Creative Industries gave keynote talks expressing their congratulations to us all for our achievements and for using technology to improve our communities. Then each digital hero was presented with a framed award by the panel of judges.


It was a truly wonderful day, and I hope to continue the discussions that were started with the other digital heroes in a google+ group so that we can help support each other over the next few years. I'm also excited to reply to my MP and invite him to look at what we are doing in Dagenham, and hopefully one day, the world!

Watching this video made me cry! Thanks to Dawn Hewitson (@DawnHewitson) Stemettes (@Stemettes) and +Alan O'Donohoe (@teknoteacher) for taking part and saying such nice things.


Wednesday, 16 October 2013

Adventures In Raspberry Pi - A book for teens and novices

Interested in Raspberry Pi but not sure how to get started? Not sure what to do once it is up and running? Want to learn how to code? Then check out my new book. (Yes, I wrote a book!) Designed to be gender neutral and fun.


Adventures include:

  • Getting set up and started with hardware 
  • Using Linux (both command line and GUI) 
  • Programming in Scratch 
  • Creating graphics with turtle 
  • Programming in Python 
  • Programming Minecraft Pi 
  • Creating music with Sonic Pi 
  • Using GPIO and basic electronics 
  • A final big project Where to go to learn more
Hope you enjoy!

You can purchase from Amazon here.

Sunday, 6 October 2013

Coding Music on a Raspberry Pi using Sonic Pi

Are you the creative type? I know I am, but I've never really been the musical type. Learning a musical instrument always seemed terribly hard work. I take my hat off to anyone that can play more than a tambourine. I love music, doesn't everybody?

Imagine my excitement then when I was introduced to Sonic Pi by +Sam Aaron, an application for the Raspberry Pi that lets your program music! 


What you will need:

  • A Raspberry Pi and peripherals (mouse, keyboard, SD card, monitor, that type of thing!)
  • some headphones or a mini speaker that will plug into the sound jack port on your Pi.
  • The latest version of NOOBS.
  • Your imagination!
You will find the Sonic Pi application on the main menu of the latest version of NOOBS, under 'Programming'. When you first run the software you will need to re size the window to fill the screen so you can see all parts of the interface.

To play a note in Sonic Pi type 'play' followed by a MIDI note number:
play 60

To add timings between the notes type 'sleep' followed by the amount of time. e.g. 1 for one second, 0.5 for half a second, and so on:
sleep 0.5

To repeat or loop a a sequence use:
3.times do 
  play 60 
  sleep 0.5 
end

To add new synths use:
with_synth "fm"

Learn Sonic Pi at School!

As you may know I am a high school/secondary school computing and ICT teacher, so together with Sam who created Sonic Pi, we wrote a scheme of work that can be taught in schools. Here is a post all about it by +Raspberry Pi with a picture of me teaching it in my school:


Why not ask your teachers about it?

Friday, 23 August 2013

Vote for 'Carrie Anne' for a Talk Talk Digital Heroes Award

For the second year running, Geek Gurl Diaries has been nominated for and chosen as a regional finalist, for a Talk Talk digital heroes award. Like last year this part of the competition is subject to a public vote. I narrowly missed out last year, but who knows this could be the year!

Please click on the image below, then 'Voting Gallery', select 'London' from the map, and scroll all the way to the bottom and click 'Vote' under my name 'Carrie Anne'.
Please vote, daily and on multiple devices!

Your support means the world to me, and to be officially recognised for the work I do in my spare time outside of teaching to improve the uptake of computing by teenage girls would really make my year!


Friday, 19 July 2013

Tips for Setting up a Coding Club for Girls

In the new academic year you may be thinking about setting up a computing or maker style club at your school. You may be a student, a teacher, a parent or a volunteer. It's not always easy to attract girls to such a club, and I have many teachers emailing me and tweeting me asking for advice on getting more girls into their clubs. Here are my tips, some might work in your area better than others, and just because you implement them all does not mean your club intake will improve overnight. This is a long process, so you need to be committed for some time!


1. Branding

Do not call your club 'ICT Club' or 'Computing Club' as many students that you want to attract will think it's just another ICT lesson, and however fantastic your lessons are, and how much they enjoy them, the general question on all children's minds is, 'why do more class work?'. It has to be fresh, fund sounding, and different.

Code Club and Coder Dojo have had wonderful success. I think branding is part of this success (role models and good activities being the other parts) If you are running an inclusive club for all children then using gender neutral colours with a good name are important. If you are running a club specifically for girls I would avoid using too many pinks. (pot, kettle, black, I know) Something with a slick logo that could be put onto stickers would attract teenagers as they will think it is something a bit special for them, rather than just an ICT club to finish class work or homework.

2. Role Models

I can not emphasize enough the importance of good female role models in Computing and STEM full stop. If you want to attract girls to a club getting outside help is a good idea. I've met many people in industry who want to know how they can help schools with coding. Reaching out to this community would be a really good idea. Organisations like STEMettes, Science Grrl, CAS #include, Code Club and Coder Dojo might be the first step. Get them to come into lessons to help promote the club as well as help with the club activities themselves.

Role models can also come in the form of other students. If you have KS5 or KS4 girls who enjoy the subject who could help your club then snap them up quick. They can attend assemblies to drum up interest. If girls see other girls enjoying it, then they are more likely to want to have a go too. Perhaps there is a nearby college or university with students who could also offer expertise, advice and act as role models. I have a number of video interviews on my channel here to help inspire.


3. Gender Neutral Activities Vs. Gender Specific Activities

If you want to run a coding club for everyone I would highly recommend having projects and activities that are gender neutral. Girls will attend coding clubs where there are more boys if the activities are creative, imaginative and fun. I've attended Coder Dojo's where there were a large group of girls who were engaged on a Saturday morning. I asked the organiser and he said they made sure that all their project ideas were not gender specific. They never highlighted the fact that there were less girls. They had different projects all the time.

If on the other hand you want to run a club specifically for girls then there are more gender specific activities that might help engage the students.One of the big hitters in this group is e-textiles. It will involve some investment in LilyPad's or Floras but they could be reused, or crowd funded.

I am in the process of creating an e-textiles activity kit for clubs that will be a free download. As soon as it is complete I will link to it from here, so stay tuned! All the parts can be purchased from skpang in the UK and I'm hoping he will put the kit together when finished. They can also be bought from Adafruit in the US and other good electronic suppliers.

Other creative coding can include using Scratch to make animations or games. At #define a workshop event CAS #include ran in June, the most popular activity was the maKey maKey session. So much so that I've invested in getting five maKey maKey's for KS3 at my school. You could get kids to make weird controllers for any scratch games they make. I made a video on creating a soundboard in scratch which is activated with a maKey maKey:

Other activities I've seen at clubs include, making music on a Raspberry Pi using code called Sonic Pi, creating fireworks across a screen using code, and using Minecraft API on Raspberry Pi to make mini games inside Minecraft.

David Whale runs many successful clubs and blogs about them here.
RasPi.tv has lots of project ideas on his website especially raspberry pi tutorials. He also runs a club at a primary school.

4. Make it fun!

this is your opportunity to escape a programme of study! Do something cool, wizz bang, hands on, awesome. Short, easily achievable, creative tasks that take maybe a few weeks to complete are key. When I ran a girls only club, we even had a fashion show one week of all the projects. They LOVED it.

5. Scheduling 

Under no circumstances should you have this club at the same time as Netball, Rounders, Hockey, Choir, Orchestra or any other group practice. This is difficult, I know, but these will always take priority at your school, and fair play, PE teachers and Music teachers give up all their time to run these, so let's support them. If you have outside people coming in to help run your clubs, then you could be confined to when they are able to come.

So what are you waiting for? Go get the coolest club for kids up and running successfully at your school!

Saturday, 6 July 2013

London Mini Maker Faire 6th July 2013

Today I attended my first Maker Faire, at Elephant & Castle, London. For the uninitiated this is the greatest show and tell experience for children (read: adults) of the maker revolution. Everything from knitting and textiles to electronics and 3D printing all in one place set out like a school fete.

I expected there to be lots of stand, which there were, with companies selling their wares, but what really surprised me was the large number of interactive learning experiences on offer from vendors and from the event itself.


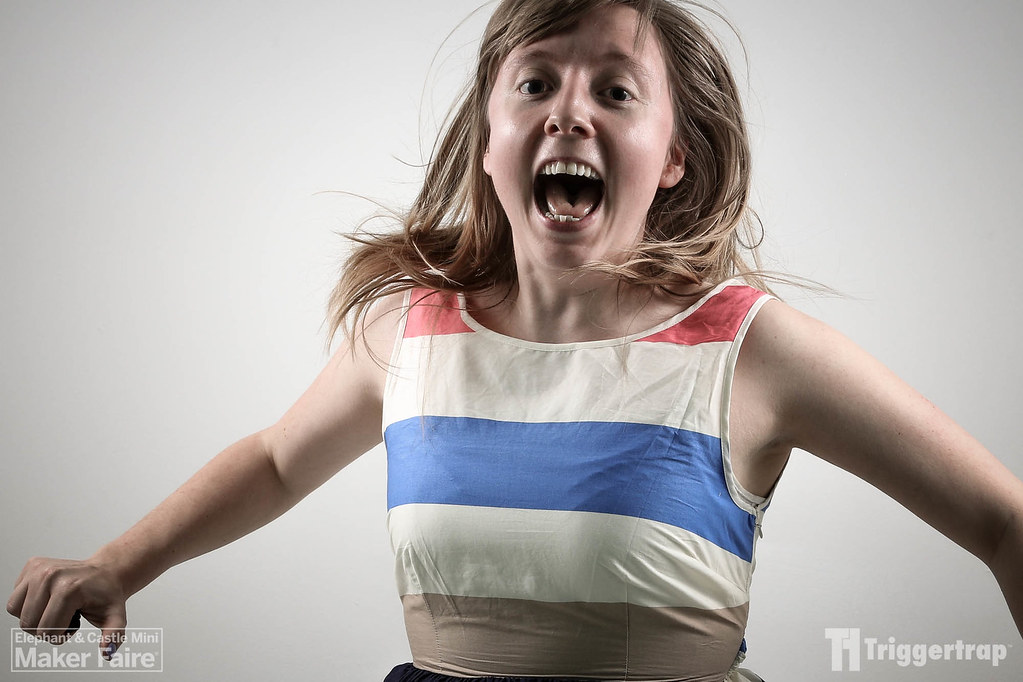
My favourite interactive experience of the day, was standing in a mock photographic studio, jumping up and down screaming at a camera in order for it to trigger the camera to take my photo. As you can see the result was... interesting! Thanks to @Triggertrap and their @Screamgrab camera. See more of their pictures here.

Another stand allowed me to write a secret message on a card and then use thermal paint of some description to screen print over the top. This meant that when cold the message was hidden, but as soon as you touched the paint with a source of heat, like your hand, the message was revealed. Thanks to @UCAPrintArea for the experience.


There were also a number of twitter interactive experiences. I had a robot @rbeetlelabs tweet me my fortune and a laser display my name when I tweeted it to #belshazzar (give it a go, it might still be displaying somewhere!)

One display by Blink Stick had a QR code that when scanned took you to a webpage that allowed you to select any colour, which in turn changed the colour of the lights on the stand. Of course once I was on that page, I was changing it all day long :) (sorry guys if it was annoying!) 

One of the most impressive things about Maker Faire is the large number of volunteers running workshops like 'Learn how to solder'. I bought a robot LED badge kit for £2 and started to solder the circuit  Sadly, the iron was far too hot and the solder was a bit rubbish so I got frustrated and decided to take it home and solder it later. I think for first timers it might be a little frustrating but then I guess they do not know any different. For me it was too annoying to sit there trying to do, but kudos to those guys giving up their time to run it and teach people. There were other workshops that were completely sold out on using blender, scratch and maKey maKey. 

If you have never been to a maker faire, I thoroughly recommend you get along to one. It is fun for the whole family. I don't think I've ever seen so many young people having fun and learning new skills all for free, nor so many teenage girls. I was stopped by a man with his daughters as I walked around who remembered me as 'that geek girl' and they seemed really interested in my experiences of the day. I hope they had fun. 

Video log of the day to come...


Thursday, 20 June 2013

Geek and Sundry Vlogger Competition

Geek Gurl Diaries You Tube Channel has been selected for the Geek and Sundry Vlogger Competition. You have one week to help me make it into the top 30 to become a finalist. Please vote for me every day by clicking here. Voting ends on 27th June.


Thanks!

Monday, 17 June 2013

My Top 5 Raspberry Pi Cases

You've got a raspberry pi but don't know whether you should encase it or not. Never fear, here are my top 5 Pi case reviews to help you out:


1. The cheap plastic case

If you really want to keep your board free from dust, danger, and ... dogs (?) then a case is a good idea. You can purchase a very reasonable cheap plastic case from ebay for under £5 delivered with slots for all the Raspberry Pi ports, including full access to the GPIO pins for those electronic projects you have planned (like the Little Box of Geek!). Sadly it does not come with any option for mounting and it is not weather proof, which could be a problem if you want to send your pi into space or leave it outside to record weather data. The case I looked at was

2. The Punnet

Fully customisable the Punnet is a fun way to protect your pi from... well... not much. But it looks totally cool and if you have access to a printer and some card is a very cheap, almost free alternative. I enjoy getting my students and other kids creating their own designs using the punnet. They can label explain all the ports and components of the Raspberry Pi by drawing on the punnet, and colour it in how they like. It's safe to say that it is definitely not weather proof, or fully dust proof, but it might help you remember where all your cables should go, and make you smile. You can print off your own punnet using this pdf.

3. The Lego Case

I love Lego. FACT. Who doesn't? Before the Raspberry Pi came along, I used to marvel at images on the internet of full tower PC cases made out of those little bricks. Even James May's Lego house filled me full of a sense of excitement. You can build anything! Of course, a natural fit would be to build a Pi Case from Lego, and it was a teenage girl who created a great step by step tutorial explaining how first! That design has been improved upon, and I made this one using the kit supplied. What I like about this design is that the lid fits snugly but comes off if you want to access the GPIO pins or even to plug in a PiCam. It was a total fiddle following the instructions, and I had to dedicate a whole hour to it's construction. Another bonus is that you can customise it using colours and bricks that work for you, and you can use up any old Lego pieces to stop you from treading on them... ouch!

4. The PiBow Case

All my students love the PiBow Case on our classroom Raspberry Pis. They are a stunning work of art from Pimoroni, and now come in a variety of different colours, not just the original rainbow. On my birthday this year, I received a surprise gift from the guys at Pimoroni who made me my very own Geek Gurl Diaries PiBow Case, with coloured noodle cables to match. It is my most prized possession  and very handy to transport my pi around in. I find PiBow Cases to be very sturdy and hard wearing. They are also clearly labelled so that you can remember where each cable goes.

5. The 'No Case' Case

Yeah okay this is cheating, but there is an argument for not using a case. One of my friends uses his Pi nearly every day to program on and he has never put it in a case. I've visited Coder Dojo's and Jams where teenagers come along, setup their Pis and have a go at a coding project, and vary rarely do any of them use a case. I guess if you are not going to use it outside or mount it onto anything (like the back of a TV or Monitor) then you don't really need to encase it. There is something very beautiful about bare electronics and  if nothing else the Raspberry Pi should show us that inside all our electronic devices there is something lurking in a very similar form, and is not to be frightened of. Opening them up and having a go (under parental/adult supervision of course!) could help us learn to create and make something better!


Wednesday, 5 June 2013

Raspberry Pi & Lifehacker Coverage

Wow! The response to my 'New Out of Box Software' video for setting up your raspberry pi has been amazing, even though the video page on YouTube is buggy, with the video freezing on the Raspi-Config page. I've had some very kind messages about my work which will inspire me to keep going!

Raspberry Pi have kindly added my video to their blog post about NOOBS.

And Lifehacker have added me to their front page and post about NOOBS too!


You can watch the video about using the new software below: 


Thanks for all your support, advice, likes, shares, follows and kind words. They mean the world to me.